Monday, September 4, 2017

Summer is ending

Labor Day Weekend

So very disheartened. I cannot even describe it with words. While there are spurts of excitement at a task completed and small progress...I am just very frustrated and yes heartbroken to a degree that the summer has passed and we were not able to launch the YB. We worked so hard and so long, through the intense heat...days, evenings, weekends, giving up all our social and fun time and we still have not reached our goal. There are moments when I wish we had not even embarked on this project.

So Friday, we glasses the deck with the THIRD layer of fiberglass, running side to side as we did the first layer. We originally thought we would need three layers of fiberglass, but it is going to need FOUR. Ugh...just ugh. (I seem to think that often!).

And we do not seem to have any pictures of it!
Uncooperative weather on labor day weekend so we focused on some more inside tasks that needed to be done BEFORE we can launch. The depth transducer was replaced with a sea cock and thru-hull for the air conditioning. The speed transducer was replaced with a tilted element depth transducer for the Garmin. (That all sounds like Greek to me). I was there and I helped and I understood what we were doing as we were doing it, but...


We removed the aged window tinting film from the salon windows as it was peeling and honestly, I did not like it. A substantial amount of adhesive residue was left behind and we tried EVERYTHING to remove it. Windex, Adhesive remover, razor blade scraping and nothing worked. In an act of desperation and frustration, I took some spray Spic'nSpan that I found in the head and sprayed the residue. To our surprise, it actually dissolved the residue and I was able to scrape it easily off with the razor knife. It has to be damp though. If I wiped the spray then tried the razor blade, that did not work. So we got the windows clean.


The clean windows inspired us to clean the salon (with Fabuloso) and replace the overhead teak strips. So now, if we can just finish the rest of the work and launch her, the salon is ready for us!


The skies cleared on Monday for a bit, so we leveled the low areas of the deck with some spot fiberglassing. Our plan is to put the final layer on fore to aft (bowling alley style).


So at the end of the summer--yes I know it "officially" ends on September 2...but weather and activity-wise, summer for me has always been Memorial Day to Labor Day---I find myself with mixed emotions. I look back at the progress and I am happy and proud. What an accomplishment! I have gained some great experience and skills. Yet the overwhelming emotion is sadness. I feel I wasted my summer...hours, days, evenings, spent working on a project that is still incomplete. And when people say "that's a boat for you"; it honestly makes me want to burst into tears. I absolutely do not mind working and working HARD, but by golly, I want to relax and enjoy life also. No romantic evening boat rides to the beach where we walk along hand in hand, sit under the setting sun and then the stars. No lazy afternoons spent on the water, water-skiing and boat-riding. No visits to family or friends. Just pure work. Time that cannot be regained. And as I look at what STILL needs to be done BEFORE we can use the boat, I am simply exhausted.

Shawn is such a support and so positive. He reminds me that we are getting the YellowBird "up to speed" and the regular maintenance and repairs will not be as arduous as this project has been! YAY!

Monday, August 28, 2017

Blood, sweat and tears!!!

See these blood drops???? Yep, they are mine!!! So now our fiberglass deck contains my blood, my sweat and my tears!


I (kinda) feel like a pro now...HUGE difference from last week to this week in my expertise! And Shawn bears the lion's share of the chore since he has to grind all the mistakes made to be redone! Love that man so much!!! He is so very talented and patient!

So when we got to our YB, "we" pulled the tarp over the Shawn Fay patented clever "awning for working on a boat deck coring" so that the work area would be shaded.


When we inspected the fiberglass from last week, we found that we had made many mistakes in that we had not completely rolled out the air bubbles that form with the resin application that laminates the fiberglass biaxial cloth. Oops! a big oops since Shawn had to grind out all the mistakes!


Last week, with the first layer application we worked from side to side (athwartship) of the deck. This week we alternated and went "bowling alley" fore to aft. Much much easier and faster in my opinion! (IF I had MY way, we would ONLY do fore to aft).

We cut the fiberglass mat the entire length of the bridge (2 lengths) and then dry-fitted the hatch side since we had to cut out the hatch portion before glassing. We also learned from last week to trim the fiberglass to the edge of the deck as it is a huge pain to grind the overlap off!


Because the sun was not directly overhead, we hung another tarp off the side to complete shade the deck. Not so much for our temperature comfort (tho it does help but to prevent the resin from hardening too quickly.


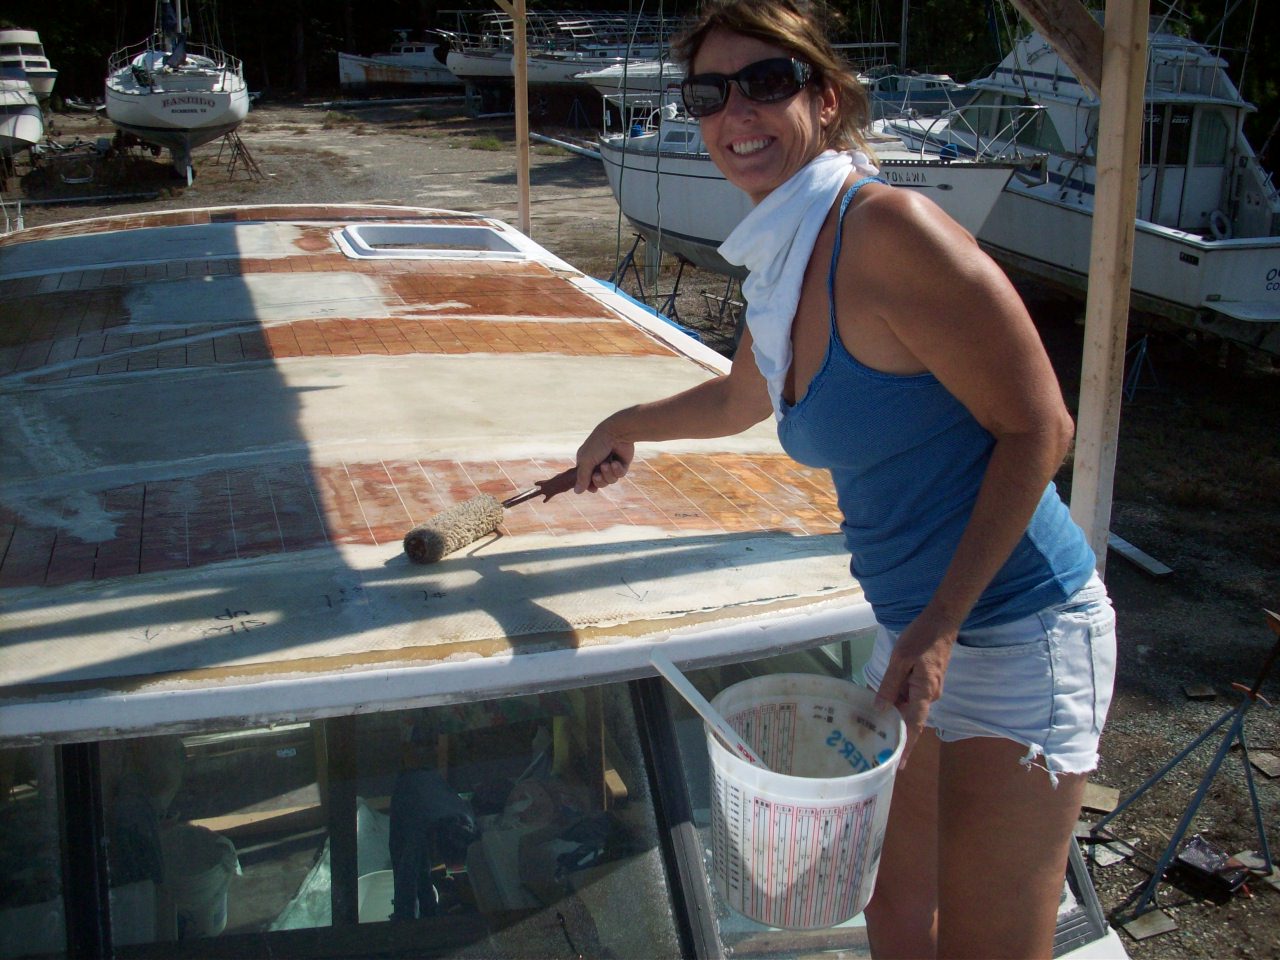
We developed a pretty good system and rhythm. Shawn would  mix and simply pour the resin on an area (we eliminated using a roller tray), then I would spread it with the paint roller so that it soaked the fibers, then I would smooth it out with the "bubble buster".  Shawn was in charge of spotting any places I missed. Oh and I wore gloves this week! We worked fore to aft on the hatch side. It came out really well!

After completing the hatch side, we simply moved over to the other side and worked aft to fore.  We learned (after consulting with the extremely knowledgeable Larry Jennings) to ensure that where the two seams of the cloth overlap:
(1) make sure there is at least an inch of overlap
(2) only roll in one direction (towards the edge of the fabric). 

If you roll back and forth (which was MY natural tendency), the fabric pulls up and bubbles. Bubbles=bad
We weighed the cloth with 2*4 timbers to keep it secure until we applied the resin mixture.


The final product looks great!!!


Incredibly enough, this layer took just over an hour to complete! How I hope the next layer is as quick!


Monday, August 21, 2017

Fiberglass At Last


WOOT!!! We got to fiberglass! I am so over the top happy!! REAL progress at last! Not that all of the previous work has not been progress, but by golly...this FEELS like progress!! WOO HOO!!!!!


For those (like me) who have never fiberglassed before, the actual FIBERGLASS part is a multi-step process. If you have been following our blog, you know about all of the previous work we had to do of recoring the deck and preparing the surface. Now in order to actually lay the fiberglass, we have to do PREP work (which I actually thought we HAD been doing!!!). The surface again has to be leveled completely with what I call the mud (it is kinda like Bondo but for boats) and sanded rough.


And remember we cut channels in the coring for the new wires to the lights in the salon? These wires had to be pulled up and laid carefully in the channels and mudded in securely.


I think I have mentioned how beastly hot the weather has been. AND I do absolutely marvel at Shawn's talents and skills. The day that we bought all the cinderblocks for the weighing the coring, we also bought lumber to build a shade awning OVER the deck for when we had to fiberglass (apparently, direct sunlight and fiberglass do not mix). So my MacGyver husband built this shade awning (I simply followed directions as he built this!).


So the mud had to be sanded smooth so no rough edges...Shawn had ME use the belt sander...uh-oh.... :(


Those wires that were to be laid in carefully and mudded over??? In my haste to sand the mud smooth....I sanded the wires!!!


SO I was summarily DISMISSED from sanding duty!!! And Shawn took over and sanded the entire deck.


I was entrusted to vacuum which I did quite well!!! AND let me tell you those two TASKS were completed in COMPLETE SILENCE between us!!!! That was a first!!!


But all is well....I simply do not have the skill set to sand YET....but I will learn to do it properly and well. :)

 So the deck is vaccuumed...now we have to epoxy over all of it to seal the mud and core so the fiberglass adheres.


Epoxy layer is complete. So we now measure and cut the fiberglass!!!! Shawn determined we would lay the pieces port to starboard so we cut four pieces. We dry-fitted them first. Then we lay each piece out working from aft to forward. He mixed the epoxy and catalyst together and we worked QUICKLY to adhere the fiberglass before the mixture set. My first fiberglass!!! I think it came out well...I had to learn to roll and bubble-bust and sometimes I just had to cut where two pieces would join together. We overlapped a bit on the seams of two pieces and we overlapped the edges, knowing SHAWN (not me!!!) would sand and grind where needed after it was set and dry.


So I may need a bunny suit next time since I managed to fberglass much of myself as well!!


The final product looks amazing!!! HAPPY DANCE!!!! We are nearing the end!!!!

And whoever these people are...there were many times during the day when we were VERY tempted to head up the road to their CRABFEAST!!!

Monday, August 14, 2017

Rolling and Tipping

August 13, 2017

Another skill set I can add to my LinkedIn Profile!!! I now know how to roll and tip. While we await the weather for fiberglassing, we have tackled some of the random tasks that are on our "to do" list before we can really enjoy our YellowBird.

Since the flybridge is removed and since we are recoring the flybridge deck, we knew we were going to repaint the flybridge. Shawn and I picked out a plain white from Jamestown Distributors. We used the Interlux Brightside Polyurethane:

(https://www.jamestowndistributors.com/userportal/show_product.do?pid=64&familyName=Interlux+Brightside+Polyurethane#).

Honestly, I find it hard to evaluate the paint colors on the computer. I wanted plain nautical white, so we chose "white" and WOW!!! is paint expensive. I had no idea!

In order to prepare myself for what we were going to do, I found this video which is excellent in demonstration:


After wet sanding and roughing,  we thinned the paint with a capful of 333. We decided I would roll and Shawn would tip, starting with the inside of the flybridge since it was more difficult with all the irregular shaped areas.


We encountered two difficulties. One was that we had to establish our work rhythm of the roll and tip....Tip too quickly after rolling and it blotches (and gets underfoot of my roller!!) and the second issue was the paint started really splotching and streaking as Shawn was tipping. We determined it was the brush, so we quickly headed to the hardware store for a better quality brush. It made a HUGE difference.


We (Shawn) devised an awning for shade as it got beastly hot. We used a cinderblock on top of the van to anchor a tarp on one side and cleat line on the boat side to create a shade awning. It worked great! And it was tons of fun climbing onto the van roof to anchor it. :)


When we finished the outside of the flybridge, it was getting dusk so the little "no see 'ums" kamiakazied into the paint before it was dry which I found very irritating because it ruined the pristine look we had worked for. However, we found they would rinse off (after the paint cured a couple of days later we rinsed them off).


BUT....while I LOVE the look of the fresh white (I think it is very nautical and fresh looking), Shawn does not like the contrast between the new paint and the old paint since the colors are different. SO...we are going to repaint the flybridge off-white (or paint the rest of the boat white!!).


And once we were finished with the flybridge, we decided to oil the teak again since the heat dries it out so much.